


Description
Payment & Security
Your payment information is processed securely. We do not store credit card details nor have access to your credit card information.
Great Prices Everyday
Australian Family Owned
Need help?

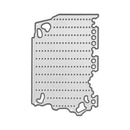
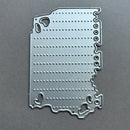
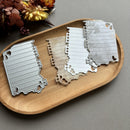
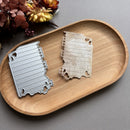
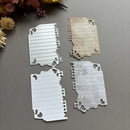
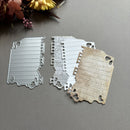
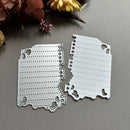
Create vintage-inspired journal and planner layouts with Poppy Crafts Cutting Dies #1524 - Journal Pages. Measuring approximately 4.8 x 7.2 cm, this decorative die features a torn-edge notebook page design with punched binder holes, stitched line detailing and small distressed cut-out accents. Perfect for junk journals, scrapbook layouts, planner decorating and layered mixed media projects, this die adds a realistic stationery-inspired look to handmade papercrafts.
Crafted from precision steel for crisp and detailed cutting results, this versatile die works beautifully with cardstock, patterned paper, vellum and specialty papers. Ideal for layering behind sentiments, creating mini note inserts and adding texture to journal spreads, this die is compatible with most leading die-cutting machines (Sold Separately), making it a practical addition to creative journalling and papercraft collections.
Key Features:
Notebook-style journal page cutting die
Approximate size: 4.8 x 7.2 cm
Features torn edges, binder holes and stitched line detailing
Ideal for junk journals, planners, scrapbooking and mixed media crafts
Perfect for layered backgrounds and stationery-inspired embellishments
Precision steel construction for clean and accurate cuts
Compatible with cardstock, vellum, patterned paper and specialty papers
Works with most leading die-cutting machines (Sold Separately)
Add realistic notebook-inspired detail and layered texture to your handmade journal spreads and papercraft projects with this versatile Poppy Crafts die.
Your payment information is processed securely. We do not store credit card details nor have access to your credit card information.

You have copied the placement for the Product Page.
Go back to the App Embeds section, and in the Paypal Advanced Settings, paste the copied value into the Product Page field and click the 'Save' button in the top right corner.